Saturday, February 18, 2012

How To: Mince An Onion


      A few weeks ago my boyfriend and I were in the mood for a quick fix dinner and instantly started craving pasta with alfredo sauce. This particular sauce requires you to soften a finely minced white onion in a pan (or at least my recipe does ). It wasn't until I asked my boyfriend to help me out by mincing an onion that I realize not everyone has watched a million cooking shows on the Food Network like I have. Perhaps something I had thought to be so basic (as mincing an onion) was indeed considered... skillful? Okay, maybe not, because it's just an onion. "Mince" simply means to cut into very small pieces, pretty basic right? If you have ever been terrified of plunging your knife into a tear inducing onion, let me simplify the process for you:


Getting started...

1: Starting with a sharp mid sized knife, cut the onion in half at the root.


2: Cut a small section of the top of the onion off, as shown below.


3: After removing the outer layer of skin, lay one half of the onion on it's side and slice horizontal slits in the onion as photographed below. Make sure not to slice all the way thru the root of the vegetable.


4: Slice slits on the top of the onion (see below). Be sure not to slice all the way thru the root of the vegetable.


5: Chop the onion in the opposite direction as shown in instruction #4. This will create an even mince:


Tip: It is important to keep the onion's root intact and uncut. This ensures that the vegetable is held together while you are mincing and prevents bits of onion from flying all over your cutting board.


Yours,
Nico

Friday, February 17, 2012

Hat Headed:

Hat- Tarnish, Dress-Vintage, Belt-Vintage, Clutch-Coach,
Bracelets- DIY, Watch-Michael Kors, Sandals-BCBG


      On occasion I can be particularly hot headed, but most days I'm just hat headed and this brimmed number is my favorite (I'm even wearing this cap in my cartoon logo!).

Yours,
Nico

PS: All photos were taken by B.Dalke


Thursday, February 16, 2012

Home Made Fruit Roll Ups:


      After making these peanut butter cups for Shahin (of TheJukeBoxGallery.net) for our anniversary, he brought up another childhood treat I always loved. Does anyone else remember Fruit By The Foot? I have very fond memories of lining the top of my mouth with these strips of fruit leather, pretending it was a retainer, and showing everyone how gross I was. I realize that this may be an unappetizing story to some, but it's a fond food memory from my childhood. Looking back, my only problem with Fruit By The Foot was that the gummy fruit strips lacked any fresh or authentic flavor. So, (of course) I decided to make my own! These fruit rolls ups do require you to stay at home near the stove or oven for quiet awhile but this recipe requires very little skill and next to no hard work. The best part? These fruit roll ups can actually be made without sugar if you have overly ripe fruit on hand, making this recipe not only utterly tasty but also extremely healthful!  


Magic Ingredients:
-1 pound fresh or frozen strawberries
-3 tablespoons lemon or lime juice
-Sugar to taste (depends on the ripeness of your fruit)

Let's get started!
1: Blend hulled strawberries with the sugar and lemon juice in a blender or food processor until smooth.


2: Transfer mixture to a pot and cook on medium high heat until it boils.


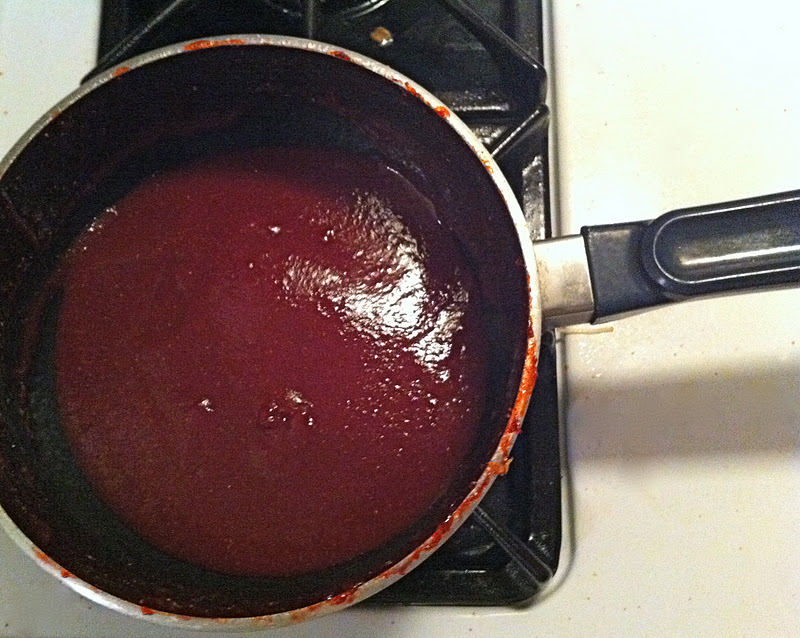
3: Once the mixture has been brought to a boil lower heat to medium low and let reduce for 30 minutes. Stir occasionally in the beginning and frequently towards the end. Mixture should look something like the photo below (sorry for the mess... cooking isn't always clean):


4: Cover a cookie sheet with foil and line it with parchment and pour the berry mixture to the center of the sheet.


5: Spread the mixture to the edges of the parchment paper leaving a small border. 


6: Bake in a 200 degree oven for 3.5 hours. (I know its a long time but using your oven beats buying a dehydrator!). Remove from oven, let cool, and cut fruit leather into even strips.


7: Roll and tie the fruit strips with string:


8: Serve! 


      Store these in a plastic zip lock in your fridge for up to one week! Mine didn't last past day 2.....


Yours,
Nico


Wednesday, February 15, 2012

Make Up Essentials:

Make Up Essential:

Make Up Essential: by nsaich on polyvore.com


      After completing this 5 minute make-up tutorial I got to thinking about my go to products. The potions that cure these tired eyes and the concoctions that help me to look like the most fabulous version of myself. The essentials if you will. I am excited to share with you all my tried and true (Nico approved) beauty products!


1: Clinique's Dramatically Different 
Moisturizing Lotion-
      Basically a drink of water for your skin. hydrating your skin (the body's largest organ) is extremely important to maintaining a youthful appearance. Contains no harsh chemicals and I love this product because I have very sensitive skin/eyes and this does not irritate either! Not that I put the lotion around my eyes or anything (that would be weird), but my eyes normally produce tears profusely with any other face lotion. 


2: Benefit's Play Stick-
      A truly versatile idea, this cream to powder product acts as both a concealer and foundation. The coverage can be worn very sheer or layered on for a more flawless finish. The best thing about benefit's play sticks? They promote healthy skin while you are covering up an imperfections! 


3: Clinique Pressed Powder:
      I love this alone for quick morning make up routines or over foundation for extra long wear and coverage. 


4: Benefit's High Beam-
      Not a day goes by where I don't use this product. This shimmering gel looks fantastic when applied on the inner corners of eyes, the brow bone, and especially on top of cheek bones. High Beam instantly gives me awake and glowing skin. The pearly pink color works on every skin tone too! 


5: Benefit's Hoola-
      A matte brown sculpting/bronzing powder. Additionally works well as blush and eyeshadow, perfect for if you can't fit all your beauty products in your purse. I've been using hoola since I was 18 and have only purchased two boxes. One box of Hoola tends to last me around 3 years, such a great value!


6: Mac Eyeshadows-
      I really love MAC eyeshadows because they offer a very wide variety of colors with staying power. But the best thing about MAC is that they offer a recycling program. When you bring in 6 empty MAC containers you receive a free lipstick of your choosing! 


7: Maybelline's Define-A-Lash Mascara + Volume-
      I prefer to use drug store brand mascaras because they need to be replaced so often. This particular mascara not only separates and lengthens your lashes but adds a touch of volume as well.


8: Maybelline's Clear Mascara-
      Again, a drugstore brand (because who wants to pay $15+ for clear mascara?!). I use this clear mascara to keep my brows in place all day long.


9: Urban Decay's Liquid Liner-
      With a new bottle design, this liner is as simple to apply as ever! I can be kind of a klutz with liquid liner but this one applies smoothly and easily. But the main selling point is that it doesn't irritate me eyes and doesn't smudge off!


10: Nivea Lip Balm-
      Ultra inexpensive+ ultra moisturizing+ tint of berry color= perfection. 


11, 12, & 13: Mac Lipsticks-
      In order from left to right: Angel, my everyday perfect baby pink. Impassioned, a bright and sunny pinkish/coral. MAC Red, perfect on all skin tones and my go to for a bold red lip. Like I mentioned in #6, MAC offers a recycling program...six empty product containers for a free lipstick of your choosing! 


      I hope you were able to discover some new products worth trying out! Now I'm curious, what are your beauty essentials?


Yours,
Nico


PS: If you click the "Make up Essentials" link under the image you will be redirected to more product information on my Polyvore site!